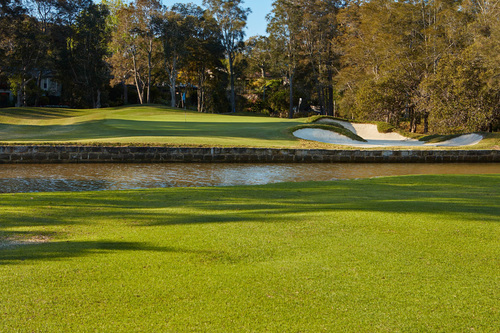
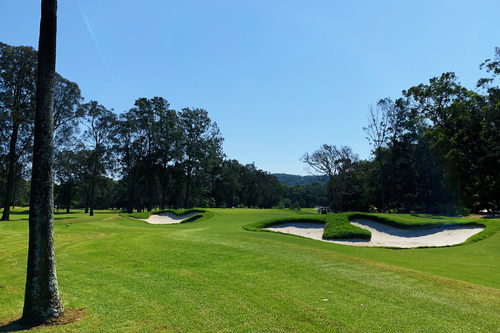
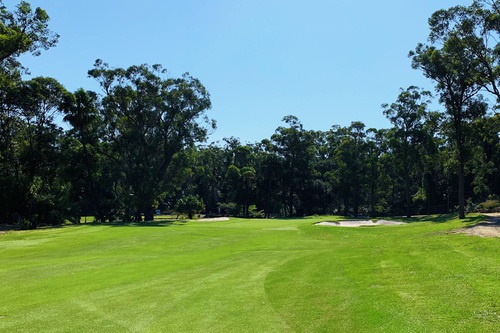
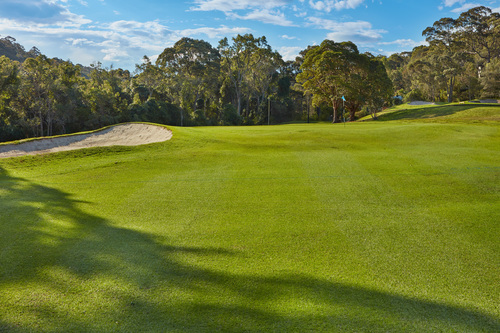
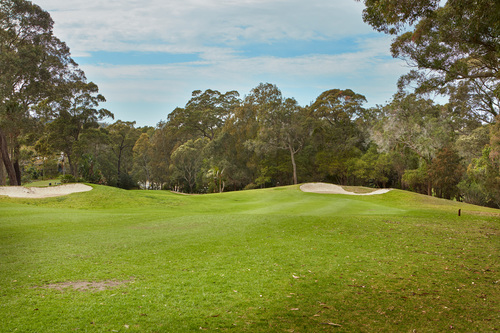
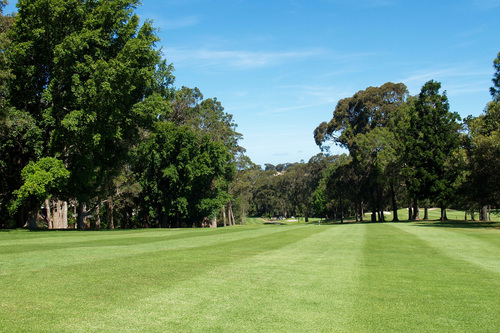
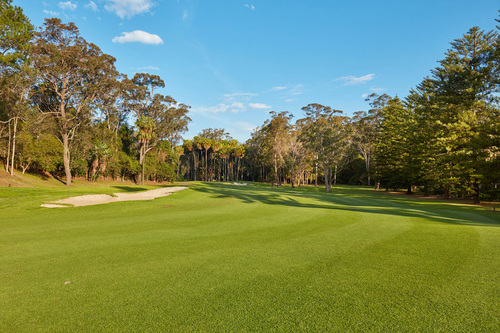
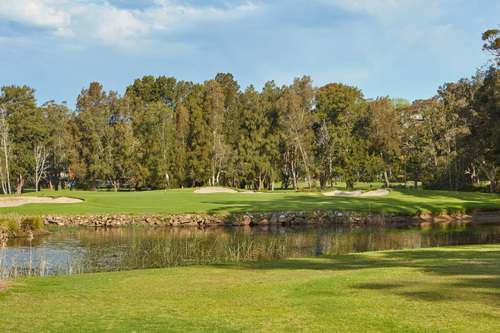
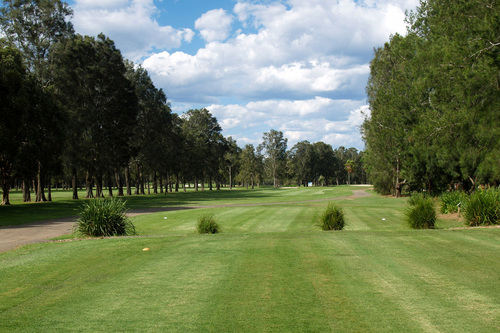
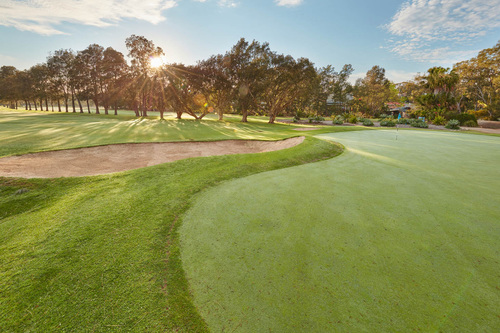
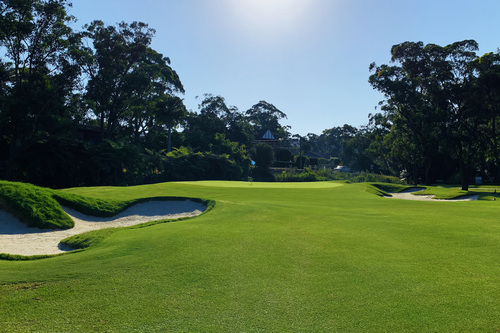
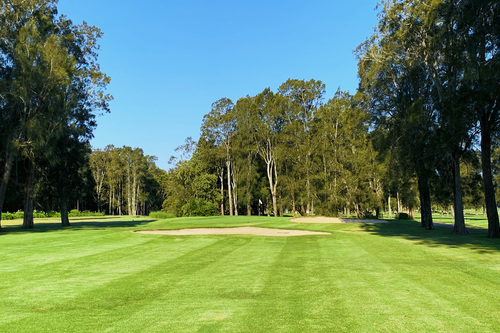
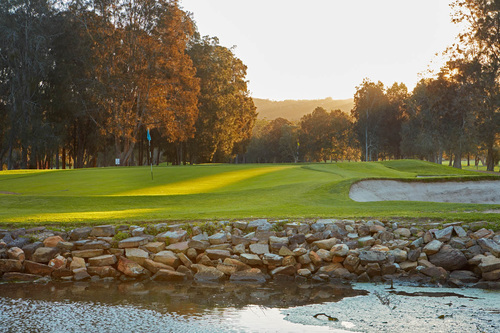
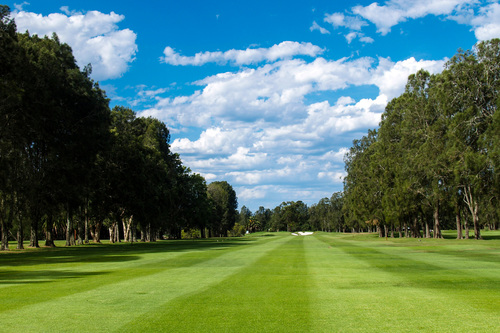
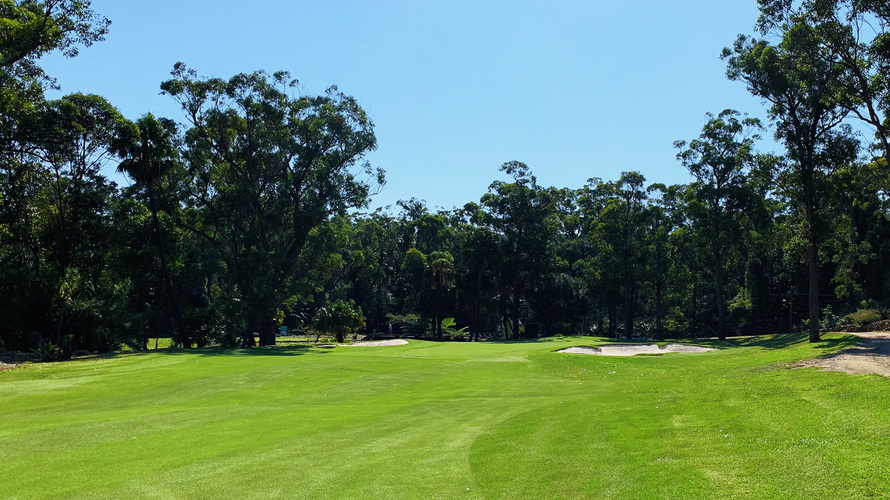
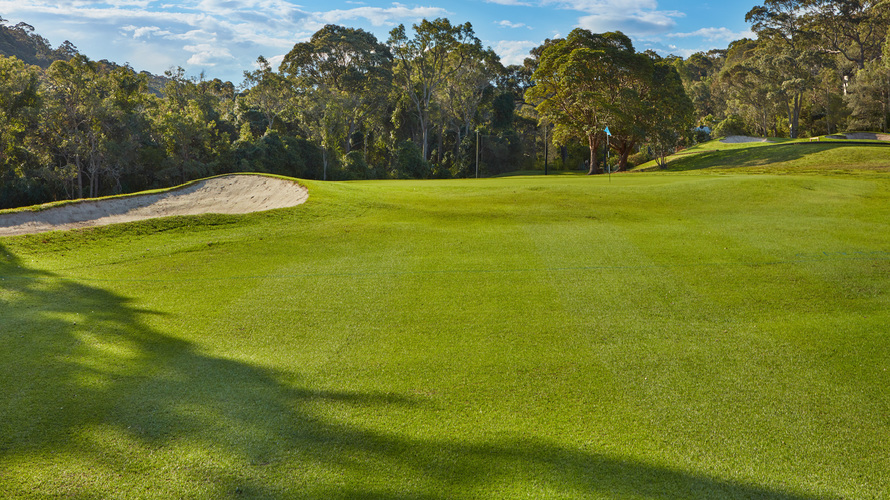
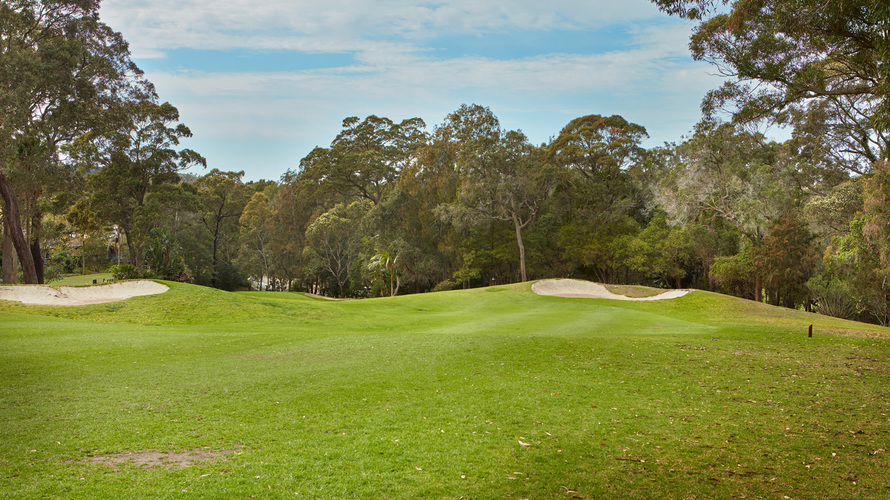
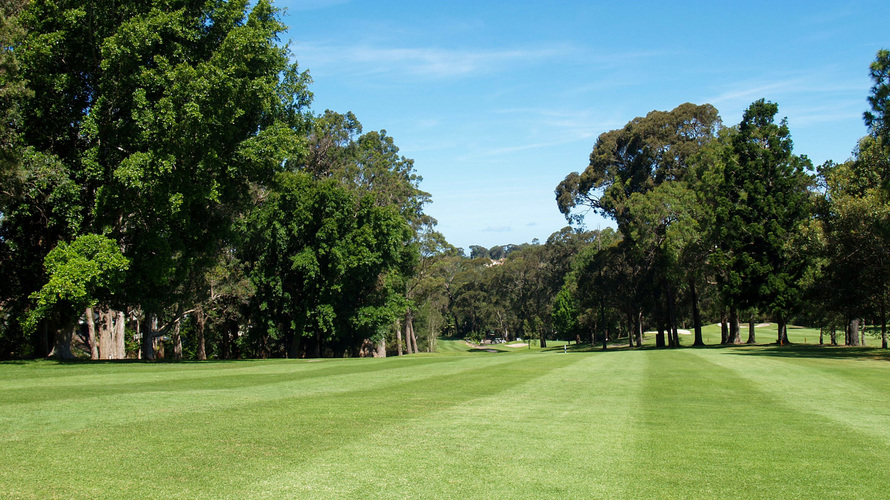
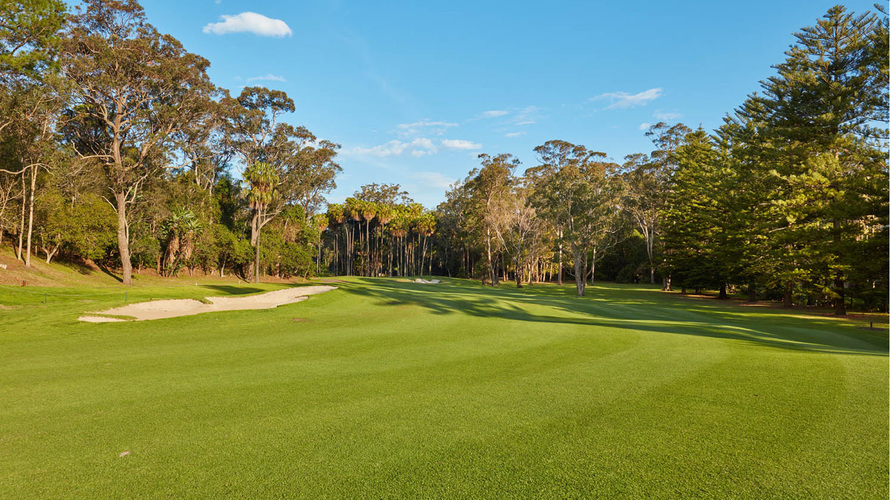
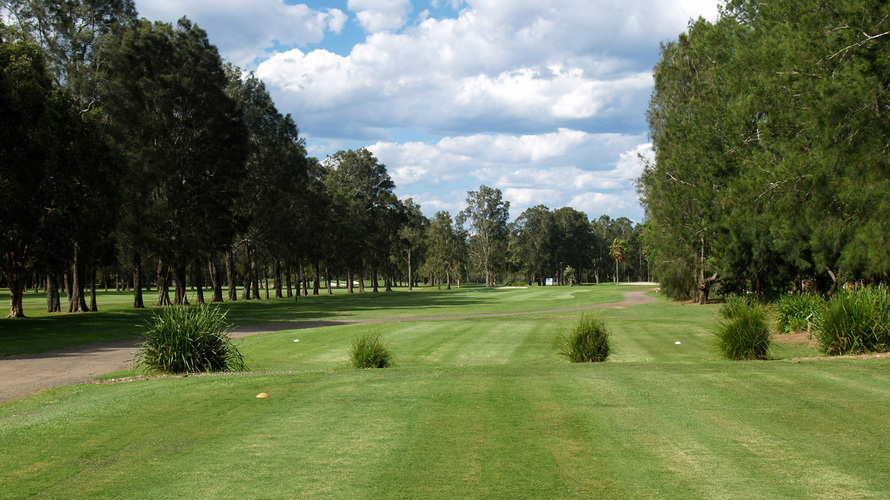
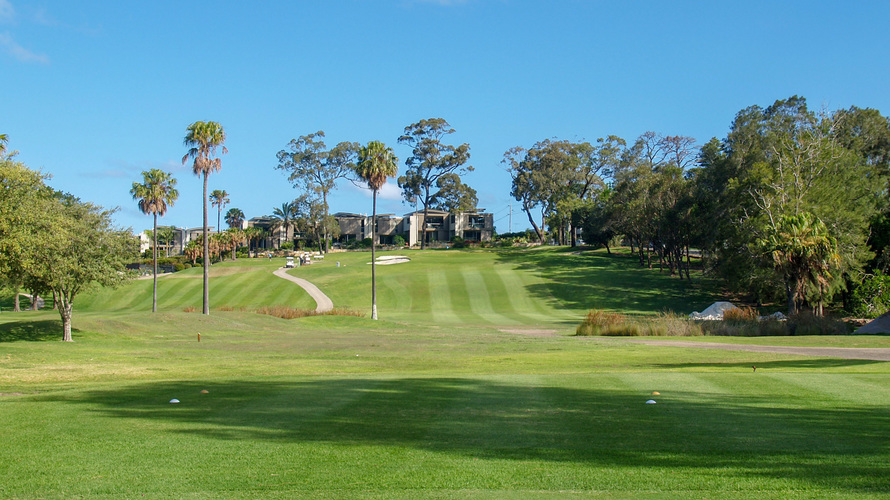
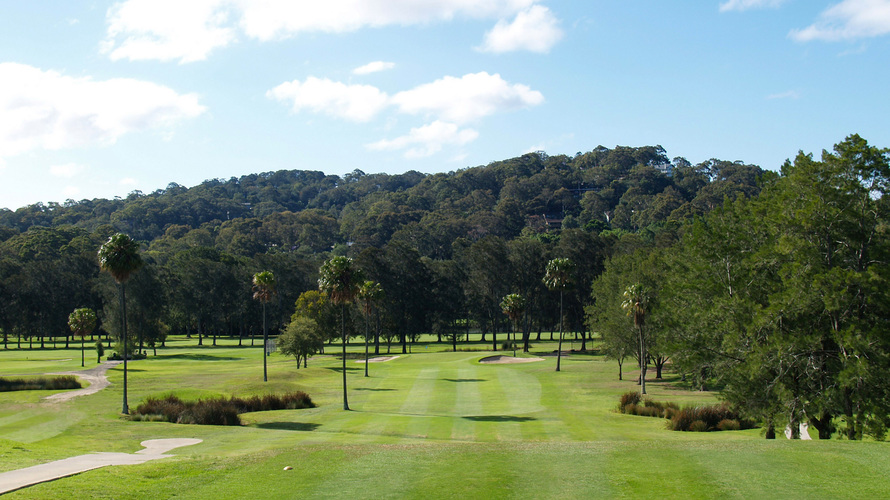
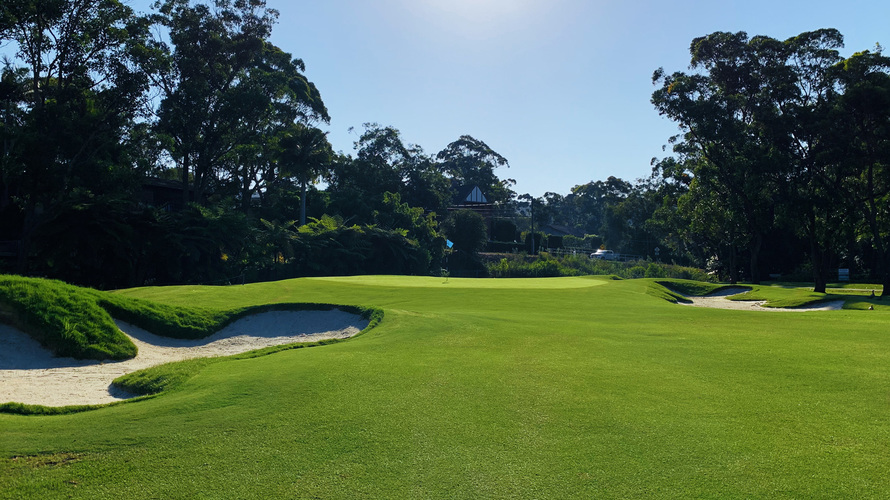
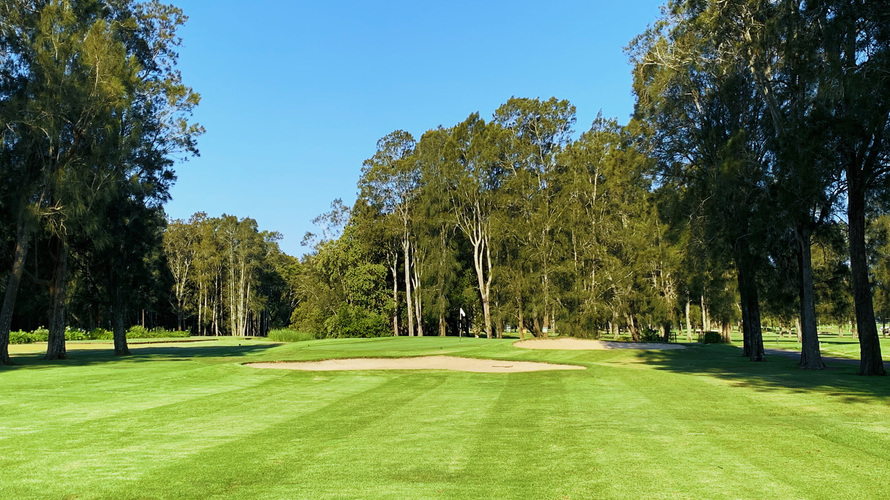
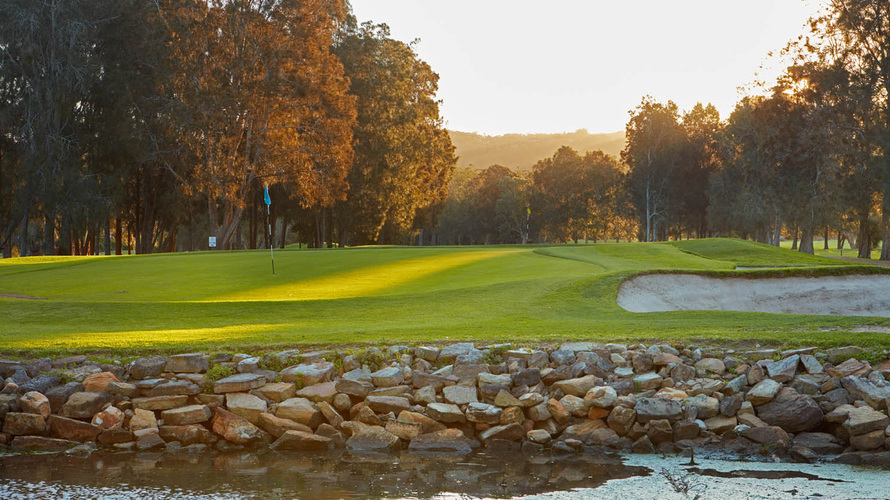
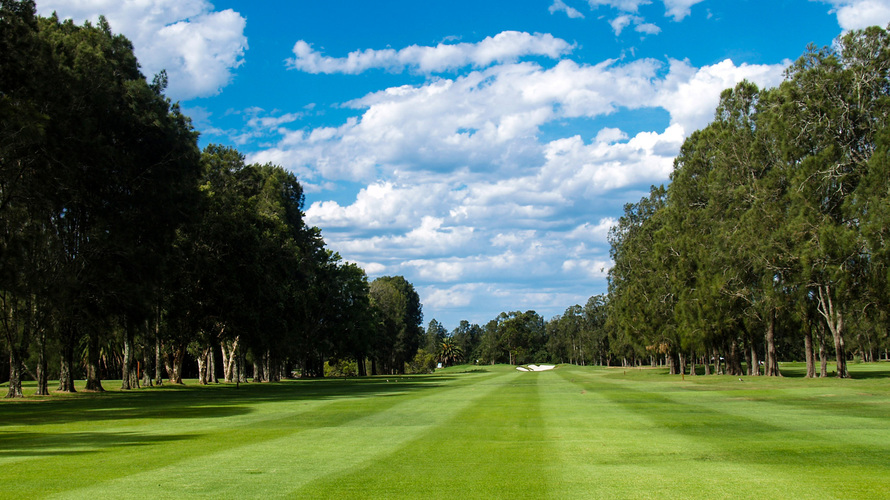
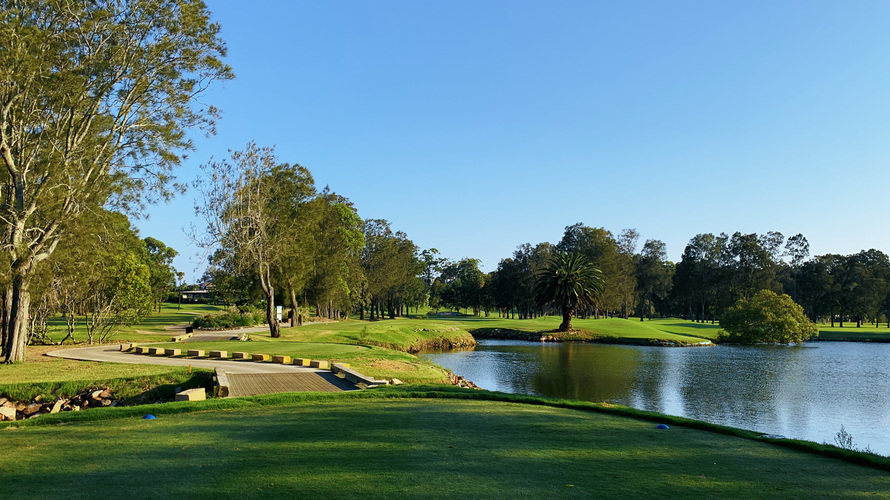
Bayview Golf Club
(7)
  • Bayview-Golf-Club_1.jpg
    • Par 70
    • 18 holes
  • Bayview-Golf-Club_2.jpg
    • Par 70
    • 18 holes
  • Bayview-Golf-Club_17.jpg
    • Par 70
    • 18 holes
  • Bayview-Golf-Club_14.jpg
    • Par 70
    • 18 holes
  • Bayview-Golf-Club_11.jpg
    • Par 70
    • 18 holes
  • Bayview-Golf-Club_5.jpg
    • Par 70
    • 18 holes
  • Bayview-Golf-Club_7.jpg
    • Par 70
    • 18 holes
  • Bayview-Golf-Club_12.jpg
    • Par 70
    • 18 holes
  • Bayview-Golf-Club_8.jpg
    • Par 70
    • 18 holes
  • Bayview-Golf-Club_6.jpg
    • Par 70
    • 18 holes

Course


tour-hole1.jpg

Hole 1

Black

  • Par: 4
  • Distance: 393 m

Blue

  • Par: 4
  • Distance: 375 m

White

  • Par: 4
  • Distance: 350 m

Red

  • Par: 5
  • Distance: 350 m

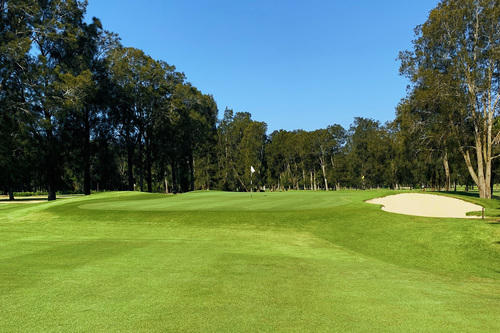
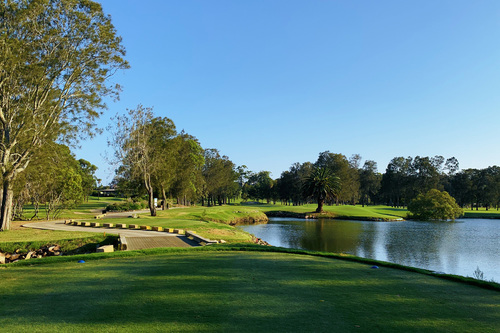
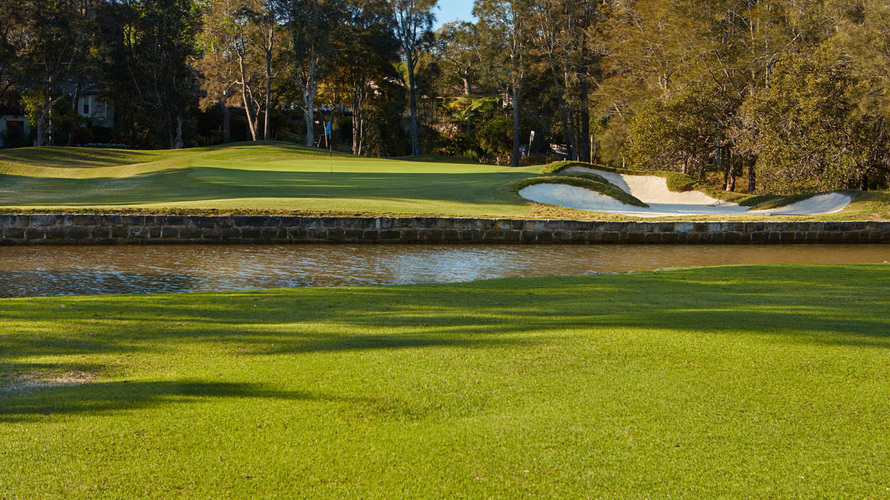
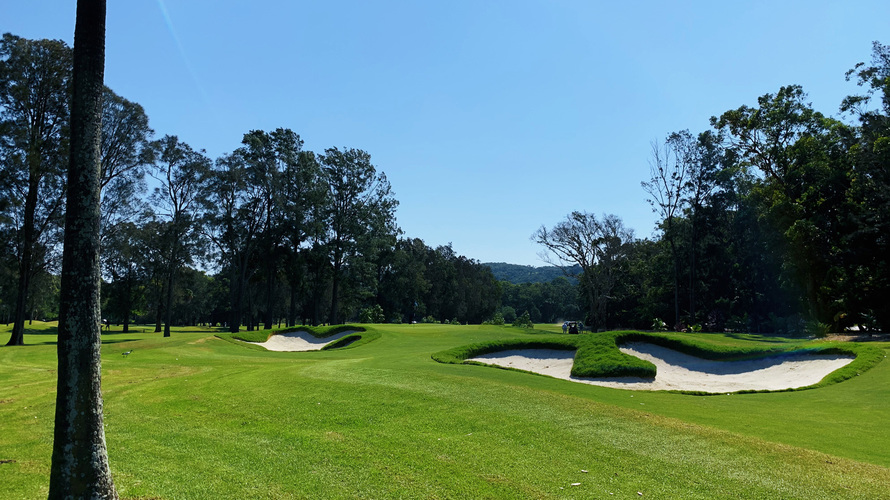
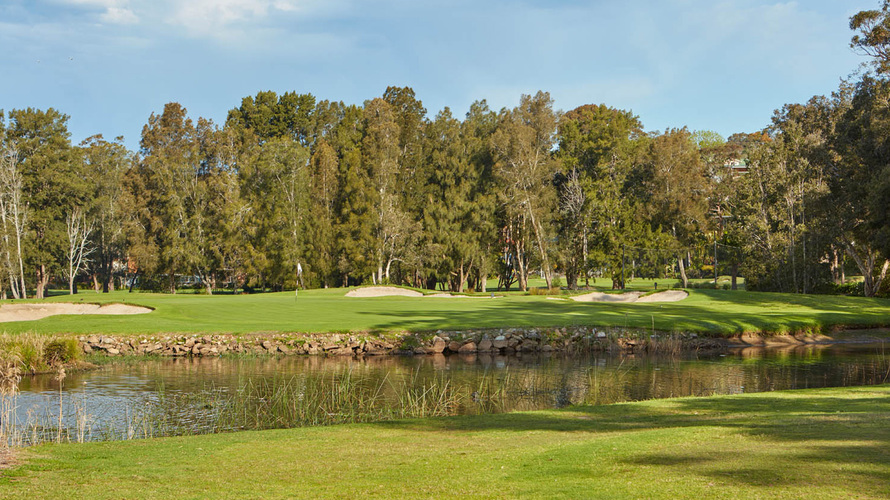
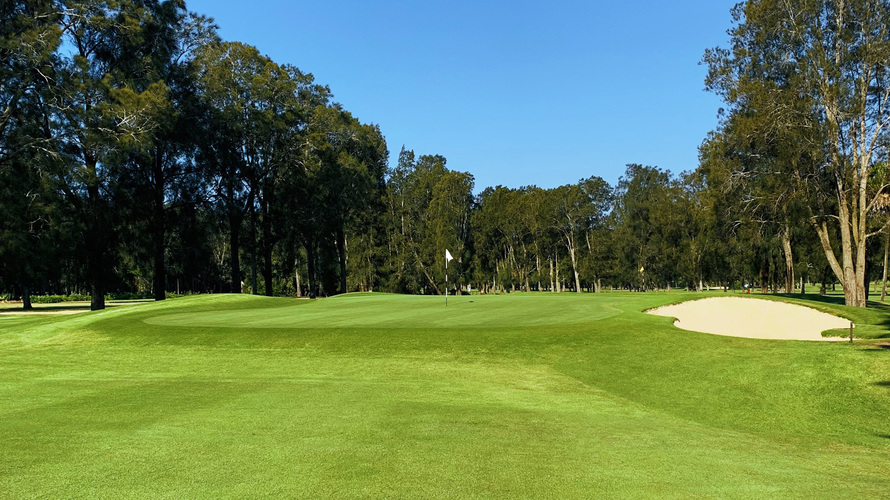
A challenging start to your round at Bayview. Aim your tee shot left of the fairway bunkers to give yourself the best chance of hitting the fairway. Take an extra club on approach as water comes into play short of the green.

tour-hole2b.jpg

Hole 2

Black

  • Par: 5
  • Distance: 470 m

Blue

  • Par: 5
  • Distance: 445 m

White

  • Par: 5
  • Distance: 415 m

Red

  • Par: 5
  • Distance: 405 m

Play your tee shot to the left side of the fairway to avoid the out of bounds down the right hand creek line. Longer hitters can attack this green on the second shot but if you are playing this hole in regulation a lay-up short of the left hand cross bunker will give you the easiest approach shot.

tour-hole3b.jpg

Hole 3

Black

  • Par: 4
  • Distance: 343 m

Blue

  • Par: 4
  • Distance: 335 m

White

  • Par: 4
  • Distance: 318 m

Red

  • Par: 4
  • Distance: 313 m

Leave the driver in the bag and position your ball to the left centre of the fairway. Any tee shot hit right of the fairway or through the fairway will find water so be cautious with your club selection. Take note of the pin position on the second shot as there can be two clubs difference between a front and back hole location.

tour-hole4.jpg

Hole 4

Black

  • Par: 3
  • Distance: 170 m

Blue

  • Par: 3
  • Distance: 165 m

White

  • Par: 3
  • Distance: 162 m

Red

  • Par: 3
  • Distance: 151 m

The green slopes from the right and any tee shots high of the pin face an extremely difficult chip or putt. Left of the pin or short of the green is an ideal position of the tee. Take an extra club as it's all uphill to the green.

tour-hole5.jpg

Hole 5

Black

  • Par: 5
  • Distance: 305 m

Blue

  • Par: 5
  • Distance: 284 m

White

  • Par: 5
  • Distance: 279 m

Red

  • Par: 5
  • Distance: 280 m

Short little dog-leg left that requires a drive around 180m off the tee that will place you at the crest of the hill. A short approach to a narrow green which slopes back to front is a challenge as it is all downhill. The downhill approach will make the ball fly further than you think so be careful of your shot selection.

tour-hole6.jpg

Hole 6

Black

  • Par: 4
  • Distance: 325 m

Blue

  • Par: 4
  • Distance: 317 m

White

  • Par: 4
  • Distance: 317 m

Red

  • Par: 4
  • Distance: 291 m

Tough par 4 all uphill until the green. A strategically placed bunker on the right side of the fairway can catch a few drives. Aim down the left side of the fairway off the tee and take an extra club to the elevated green. A large pot bunker short of the green can be a challenge if found.

tour-hole7.jpg

Hole 7

Black

  • Par: 4
  • Distance: 375 m

Blue

  • Par: 4
  • Distance: 349 m

White

  • Par: 4
  • Distance: 315 m

Red

  • Par: 4
  • Distance: 279 m

Bayview's signature hole. A sharp dog-leg left has you tossing up whether or not to take on the corner. Ideal play here would be to play safe and keep the ball where you can see it. This will still leave you a short approach shot to the green. Be sure not to find the fairway bunker off the tee.

tour-hole8.jpg

Hole 8

Black

  • Par: 3
  • Distance: 137 m

Blue

  • Par: 3
  • Distance: 135 m

White

  • Par: 3
  • Distance: 110 m

Red

  • Par: 3
  • Distance: 101 m

Challenging par 3 which requires you to carry it all the way to the green over water. Green slopes back to front with bunkers surrounding. Club selection here is crucial as there is a large tier in the green.

tour-hole9b.jpg

Hole 9

Black

  • Par: 4
  • Distance: 364 m

Blue

  • Par: 4
  • Distance: 341 m

White

  • Par: 4
  • Distance: 354 m

Red

  • Par: 4
  • Distance: 326 m

Straight forward par 4 that a tee shot down the left side of the fairway will prove more rewarding. Be sure to have enough club with your approach shot as a small ditch short of the slightly elevated green seems to be a common spot.

tour-hole10.jpg

Hole 10

Black

  • Par: 3
  • Distance: 210 m

Blue

  • Par: 3
  • Distance: 191 m

White

  • Par: 3
  • Distance: 191 m

Red

  • Par: 4
  • Distance: 183 m

A long par 3 for gents and a short par 4 for the ladies. Straight forward hole which requires a good tee shot. Avoid anywhere right as there is out of bounds beyond the creek.

tour-hole11.jpg

Hole 11

Black

  • Par: 4
  • Distance: 211 m

Blue

  • Par: 4
  • Distance: 198 m

White

  • Par: 4
  • Distance: 198 m

Red

  • Par: 4
  • Distance: 175 m

A par 4 all uphill that can be reachable for some off the tee. Approach shots from short of the green can be tricky from a side hill lie. The green will prove to be one of the most difficult on the course.

tour-hole12.jpg

Hole 12

Black

  • Par: 3
  • Distance: 192 m

Blue

  • Par: 3
  • Distance: 186 m

White

  • Par: 3
  • Distance: 186 m

Red

  • Par: 3
  • Distance: 166 m

Par 3 from an elevated tee. Consider taking one less. Best spot to leave it is short left for an easy approach to any pin position on this hole.

tour-hole13b.jpg

Hole 13

Black

  • Par: 4
  • Distance: 329 m

Blue

  • Par: 4
  • Distance: 317 m

White

  • Par: 4
  • Distance: 317 m

Red

  • Par: 4
  • Distance: 311 m

Straight par 4 which a long drive will leave you with a short approach shot into the green. Be careful not to go over the back as there is a steep drop-off which will prove to be a tough chip back up.

tour-hole14.jpg

Hole 14

Black

  • Par: 5
  • Distance: 425 m

Blue

  • Par: 5
  • Distance: 419 m

White

  • Par: 5
  • Distance: 410 m

Red

  • Par: 5
  • Distance: 392 m

Double dog-leg par 5 that requires accuracy off the tee. A perfect drive will tempt you to go for this in 2. Be careful with your club selection into the green as water is directly beyond. Huge green which narrows towards the back.

tour-hole15.jpg

Hole 15

Black

  • Par: 5
  • Distance: 444 m

Blue

  • Par: 5
  • Distance: 430 m

White

  • Par: 5
  • Distance: 376 m

Red

  • Par: 5
  • Distance: 316 m

Dog-leg right par 5 which requires a straight tee shot. Once beyond the path, the hole shapes to the right with our signature palm trees directly in front of your next shot. Another strategically placed bunker 30m short of the green makes this par 5 a little more tricky.

tour-hole16.jpg

Hole 16

Black

  • Par: 3
  • Distance: 144 m

Blue

  • Par: 3
  • Distance: 144 m

White

  • Par: 3
  • Distance: 112 m

Red

  • Par: 3
  • Distance: 106 m

Ensure you take enough club to carry the creek. Aim for the back centre of the green to avoid any trouble.

tour-hole17.jpg

Hole 17

Black

  • Par: 4
  • Distance: 413 m

Blue

  • Par: 4
  • Distance: 404 m

White

  • Par: 4
  • Distance: 382 m

Red

  • Par: 5
  • Distance: 381 m

The number 1 rated hole at Bayview. Two long straight shots should get you near the green. Water borders the green on the left and a large bunker will catch any shots short right.

tour-hole18.jpg

Hole 18

Black

  • Par: 4
  • Distance: 326 m

Blue

  • Par: 4
  • Distance: 326 m

White

  • Par: 4
  • Distance: 269 m

Red

  • Par: 4
  • Distance: 255 m

Challenging tee shot with a bunker to catch any to the right and water running the length of the hole on the left. Smart play will see you leave the driver in the bag. Make sure you have enough club on approach ensure you carry the small pond short left of the green.

Enquire Now