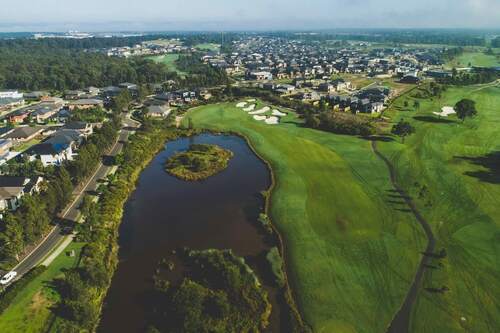
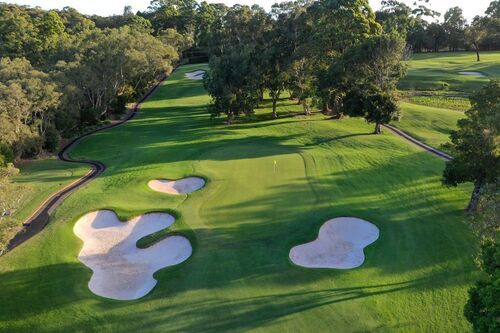
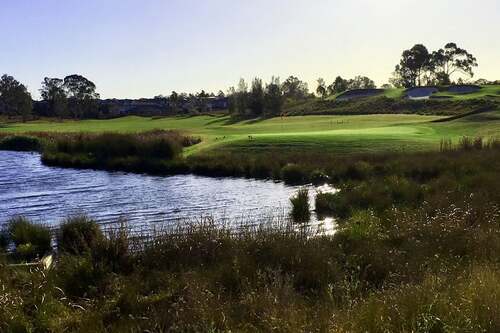
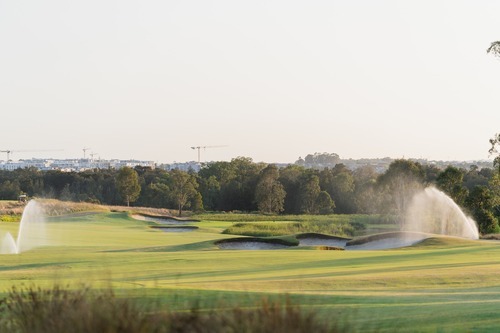
Stonecutters Ridge Golf Club
(13)
  • Rank
    63
  • bd7dcaaf87caf20fa75b311f50b9ff74b8d3c985.jpg
    Rank
    63
    • Par 72
    • 18 holes
  • bf111abb08acbc52ea01a36ff8bf9fb4.jpg
    Rank
    63
    • Par 72
    • 18 holes
  • Stonecutters-Ridge-Golf-Club_3.jpg
    Rank
    63
    • Par 72
    • 18 holes

Course


Hole 1

Blue

  • Par: 5
  • Distance: 520 m

White

  • Par: 5
  • Distance: 504 m

Red

  • Par: 5
  • Distance: 443 m

Stonecutters opens with the only par 5 on the front 9. A generous driving hole with a wide open fairway. A hazard runs the entire length of the left side and out of bounds is far to right which should not come into play. A good drive will finish just left of the lone tree and bunkers on the right side. The hole doglegs slightly to the left for the second shot played with a fairway or hybrid but a straight shot will also find the fairway and provide a short 3rd shot to tight green. A large greenside bunker on the right and small pot bunker on the left call for accuracy. The hazard line also lies very close to the left side of green with drop zones front and rear.

Hole 2

Blue

  • Par: 4
  • Distance: 398 m

White

  • Par: 4
  • Distance: 366 m

Red

  • Par: 4
  • Distance: 332 m

This is one of the more difficult pars on the course due to its length. The hazard on the right of the teeing area should not come into play. A sole bunker awaits a tee shot down the right hand side and dense trees and shrubs line the entire length of the left rough. Any shots hit down the left hand side will require a long second shot over 3 large, deep bunkers.

Hole 3

Blue

  • Par: 4
  • Distance: 388 m

White

  • Par: 4
  • Distance: 356 m

Red

  • Par: 4
  • Distance: 324 m

The course now opens up to a double fairway. A slight dogleg right, the best tee shot will be left of the signature tree. The second shot must negotiate this tree in the centre of the fairway, by playing over or around it. A water hazard hugs the right side of the green from 100 metres out and a bunker left of the green will catch any shots steered away from the water.

Hole 4

Blue

  • Par: 4
  • Distance: 343 m

White

  • Par: 4
  • Distance: 339 m

Red

  • Par: 4
  • Distance: 285 m

This hole shares the double fairway with the 3rd. The water hazard hugging the right hand side can be avoided by driving to the open left side of the fairway. An approach from this side though means coming in, over 3 large deep bunkers on the left side of the green.

Hole 5

Blue

  • Par: 4
  • Distance: 320 m

White

  • Par: 4
  • Distance: 310 m

Red

  • Par: 4
  • Distance: 285 m

A tricky short par 4 with a hazard to the right off the tee and fairway bunkers right and left in the landing area. Best played with a fairway or hybrid from the tee to lay up short of the bunkers and the hazard which lies past the right hand bunkers unseen from the tee. The second shot will be with a short iron over the hazard to a narrow green.

Hole 6

Blue

  • Par: 3
  • Distance: 176 m

White

  • Par: 3
  • Distance: 146 m

Red

  • Par: 3
  • Distance: 110 m

The only par 3 on the front 9. Visually an outstanding hole from the tee. Deep bunkers immerse themselves in the water hazard which extends the entire length of the hole on the left. There is a large bail out area short and right of the green but it will be difficult to get up and down for par. Success favours the brave on this hole.

Hole 7

Blue

  • Par: 4
  • Distance: 322 m

White

  • Par: 4
  • Distance: 312 m

Red

  • Par: 4
  • Distance: 248 m

Another visually stunning hole from the tee. A water hazard extending the length of the left fairway demands a long drawn tee shot or a lay up to the right short of the rough on the corner of the dog leg. Bunkers cascading down the rise behind and to the right of the green make for an intimidating approach shot. The bailout area left of the green is safe option however it will be a difficult chip and putt to make par.

Hole 8

Blue

  • Par: 4
  • Distance: 394 m

White

  • Par: 4
  • Distance: 384 m

Red

  • Par: 4
  • Distance: 345 m

A perfect hole for anyone who fades the ball. Aim down the left side of the fairway, drive to the top of the hill and let the natural lie of the land feed the ball back to the centre. The longer hitters can take on the bunkers on the corner of the dog leg to shorten the hole and provide the best chance for a short iron on the second shot. Large, deep bunkers guard the left side of the green but there is plenty of room to the right of the green to avoid them.

Hole 9

Blue

  • Par: 4
  • Distance: 388 m

White

  • Par: 4
  • Distance: 381 m

Red

  • Par: 4
  • Distance: 317 m

The number 1 handicap hole on the course completes the outward 9 and is another hole that will suit anyone that fades the ball with a slight dogleg right. Again the long hitters can take on the bunkers on the right and if you can drive it to the top of the hill you will get some extra yards down the other side and only have a short iron in. A bunker left of the green and a large, deep collection areas on the right and behind the green will make for a challenging 3rd shot if you miss the green.

Hole 10

Blue

  • Par: 5
  • Distance: 508 m

White

  • Par: 5
  • Distance: 479 m

Red

  • Par: 5
  • Distance: 426 m

The inward 9 starts with the first of 3 par 5’s to come. A beautifully designed hole with fairway bunkers right for the shorter hitters and left for the longer hitters. The second shot will leave many with the decision of whether to go for the green in 2 or lay up safely. Laying up just short of the next fairway bunker on the right will leave a short pitch of about 80 metres. A long narrow green with a bunker left an water hazard to the right requires accurate direction and distance control for a chance at a birdie putt.

Hole 11

Blue

  • Par: 3
  • Distance: 148 m

White

  • Par: 3
  • Distance: 137 m

Red

  • Par: 3
  • Distance: 122 m

The signature hole on the course can seem intimidating from the tee. A collection of sculptured bunkers spill from the elevated green down the approach. Forming what may seem like an impenetrable wall of sand. This shot requires control of height, distance and direction to successfully land on the green. You will feel a great sense of achievement if you succeed.

Hole 12

Blue

  • Par: 4
  • Distance: 386 m

White

  • Par: 4
  • Distance: 374 m

Red

  • Par: 4
  • Distance: 338 m

The first of 3 par 4’s on the back 9. A dog leg left over the hill, fairway bunkers on the left force tee shots to the right side where long native grass awaits. A fairway or hybrid hit from the tee will provide safe option but a long second shot over the hill to an unseen green nestled amongst the trees. A feature of this hole is the bunker left of the green built around a mature tree.

Hole 13

Blue

  • Par: 4
  • Distance: 355 m

White

  • Par: 4
  • Distance: 350 m

Red

  • Par: 4
  • Distance: 320 m

From an elevated tee to a fairway sloping up between bunkers right and left in the landing area. You need to hit driver though to have a chance at hitting a lofted iron to a green at the top of the rise. Bunkers right and below the hole are two of the largest and deepest on the course, protecting a green that runs across the approach angle.

Hole 14

Blue

  • Par: 4
  • Distance: 370 m

White

  • Par: 4
  • Distance: 345 m

Red

  • Par: 4
  • Distance: 308 m

The fairway sloping down and away to the large tree on the right hand side gives the opportunity to hit a long drive and . If you hit your drive to near the tree you will have only a short iron to an elevated green. This is the only tiered green on the course with a rise of more than a metre from front to back. It is important to know whether the pin position is front or back or you’ll be faced with a daunting uphill or downhill putt.

Hole 15

Blue

  • Par: 5
  • Distance: 494 m

White

  • Par: 5
  • Distance: 472 m

Red

  • Par: 5
  • Distance: 409 m

A long, straight, open par 5. This is where you will be in contention for the long drive competition with a straight tee shot. Native grass on both sides of the fairway are the harsh penalty for a wayward shot and maybe a lost ball. The second shot with a hybrid or a fairway will need to finish short of the next fairway bunker. Leaving a short pitch to a large sloping green with deep bunkers to the left.

Hole 16

Blue

  • Par: 3
  • Distance: 181 m

White

  • Par: 3
  • Distance: 159 m

Red

  • Par: 3
  • Distance: 111 m

A beautiful par 3 hole with a daunting view. You are faced with a wall of native grass in front of the tee, a water hazard front and left of the green, bunkers and native grass left and right to the rear. One of the higher parts of the course it can be windy most days making club selection important as well as hitting a perfect shot. There is the safe option of hitting short and right for anyone running out of balls at this point.

Hole 17

Blue

  • Par: 3
  • Distance: 151 m

White

  • Par: 3
  • Distance: 144 m

Red

  • Par: 3
  • Distance: 115 m

Another great par 3 to a large sloping green with many undulations making reading your putt an art form. Large bunkers front left and rear will present a difficult second shot for any ball not on the green.

Hole 18

Blue

  • Par: 4
  • Distance: 415 m

White

  • Par: 4
  • Distance: 400 m

Red

  • Par: 4
  • Distance: 330 m

The finishing hole with the club house in view calling you in. A daunting tee shot with driver over the long native grass on the best of days but into the prevailing wind it can be difficult to reach the fairway for shorter hitters. After your drive down the middle it’s time to use your longest fairway and go for the green in 2. There is a large landing area in front of the green for those who hit short but large deep bunkers left and right demanding a straight approach. The green is sloping up from the front to the rear with undulations to make putting a slippery challenge. A fitting end to a great day of golf.

Enquire Now